Posted on

A Practical Hand Mitre Saw Framework for Mastering Woodworking Skills

Craftsman using a hand mitre saw in a well-organized workshop for precise wood cutting.

Understanding the Hand Mitre Saw: A Comprehensive Guide

The hand mitre saw is an essential tool in woodworking and construction, designed for precision and versatility. Whether you’re a seasoned craftsman or a beginner, understanding the nuances of this tool can significantly enhance your project outcomes. In this comprehensive guide, we will delve into what a hand mitre saw is, its key features, benefits, and the types of cuts it can achieve. When exploring options, a hand mitre saw provides comprehensive insights into craftsmanship that can elevate your woodworking skills.

What is a Hand Mitre Saw?

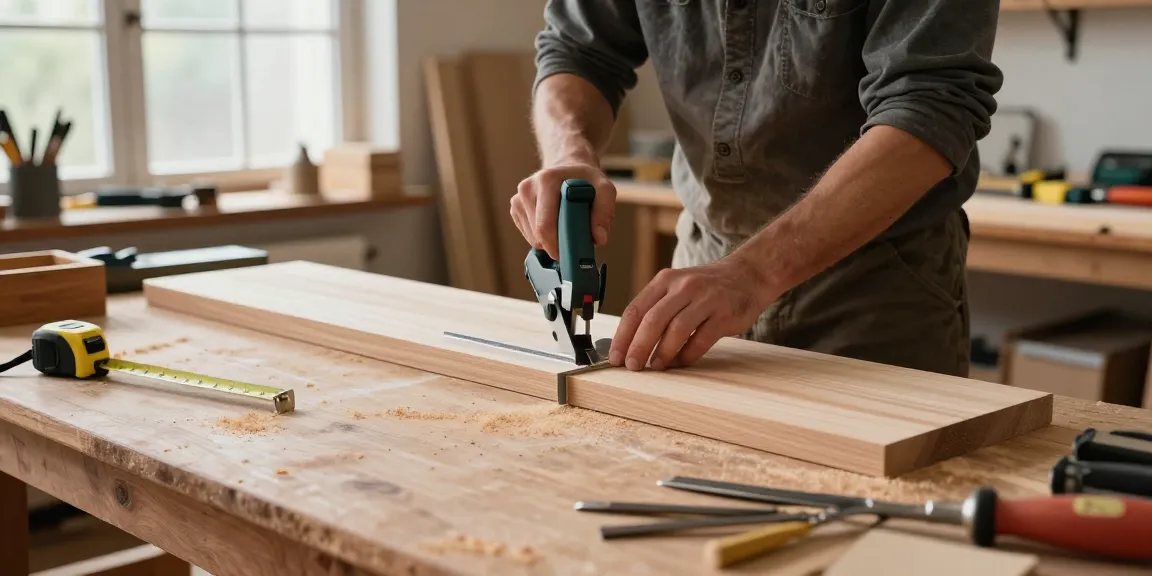
A hand mitre saw, also known as a mitre box saw, is a manual cutting tool used for making precise crosscuts and angled cuts in wood or other materials. The saw blade is mounted in a frame, allowing the user to guide it along predetermined angles, typically 45 degrees and 90 degrees. This saw is particularly useful for creating joints, picture frames, and moulding, providing greater control than power saws while requiring minimal setup.

Key Features and Benefits of Hand Mitre Saws

  • Precision Cutting: With the ability to make exact angle cuts, hand mitre saws are ideal for intricate work.
  • Portability: Unlike power tools, hand mitre saws can be used anywhere without the need for electricity.
  • Affordability: Generally more cost-effective than their powered counterparts, making them accessible for hobbyists and professionals alike.
  • Safety: Hand mitre saws are considered safer, as they do not have the same risk of kickback associated with power saws.

Types of Cuts You Can Achieve with a Hand Mitre Saw

Hand mitre saws are primarily designed for two types of cuts: crosscuts and mitre cuts. Crosscuts are made across the grain of the wood, while mitre cuts are angled cuts typically used for framing and corners. Additionally, some saws allow for bevel cuts, which are angled cuts made along the thickness of a board. Mastery of these cuts enables woodworkers to create visually appealing joints and structures.

Choosing the Right Hand Mitre Saw for Your Projects

Selecting the right hand mitre saw involves considering a variety of factors to ensure it meets your specific needs. Understanding the features and specs of different models can significantly impact your woodworking experience.

Factors to Consider When Selecting a Hand Mitre Saw

  • Blade Size: Common sizes range from 10 to 14 inches, where larger blades can handle thicker materials.
  • Material: Look for a saw made from high-quality materials, such as hardened steel for durability.
  • Adjustability: The ability to adjust the mitre angles accurately is crucial for precision.
  • Weight and Portability: A lighter model may be preferable for those who need to transport their tools frequently.

Top Brands and Models in 2026

As of 2026, several brands stand out in the hand mitre saw market for their quality and innovation. Brands like Stanley, Bosch, and DeWalt consistently receive high ratings for their craftsmanship and user-friendly designs. Look for models that offer features like ergonomic handles, easy-to-read angle markings, and robust construction for a better overall experience.

Comparing Manual vs. Powered Options

While powered mitre saws can offer speed and efficiency, hand mitre saws provide unmatched control and precision, especially for detailed work. Manual options often require more effort but can lead to greater craftsmanship. Assess your project requirements: for quick cuts, powered options might be preferable, while hand mitre saws excel in detailed, intricate work.

Mastering Techniques with a Hand Mitre Saw

Once you’ve selected your hand mitre saw, mastering the techniques for using it effectively is crucial for achieving superior craftsmanship. Understanding proper handling and cut techniques can significantly enhance the quality of your work.

Essential Safety Precautions When Using a Hand Mitre Saw

Prioritizing safety is vital when working with any saw. Always ensure you wear safety goggles to protect your eyes from sawdust and debris. Keep your fingers clear of the blade’s path, and work in a well-lit area to maintain visibility. Additionally, using clamps to secure your workpiece can prevent movement, ensuring stable and accurate cuts.

Step-by-Step Guide to Making Accurate Cuts

  1. Measure: Use a tape measure to mark where you want to cut, ensuring accuracy.
  2. Set the Angle: Adjust the mitre saw to the desired angle for your cut.
  3. Secure the Piece: Use clamps to hold your workpiece in place.
  4. Cut: Position the saw over the marked line and apply steady pressure as you cut.
  5. Check Your Work: After cutting, double-check the accuracy before proceeding with assembly.

Common Mistakes and How to Avoid Them

One common mistake is not measuring accurately before cutting, which can lead to wasted materials. Always double-check your measurements. Additionally, improper handling can lead to uneven cuts; ensuring your technique is consistent can help produce clean edges.

Enhancing Your Woodworking Skills with Add-Ons

To maximize the effectiveness of your hand mitre saw, consider using accessories and complementary tools. The right add-ons can significantly enhance your efficiency and precision when working on various projects.

Useful Accessories for Hand Mitre Saws

  • Cuts Guides: Using a guide rail can help ensure straight and accurate cuts.
  • Vise Clamps: These can help secure your workpiece firmly during cutting.
  • Replacement Blades: Keeping sharp blades is essential for clean cuts; having a few options can allow you to switch based on the material.

Combining the Hand Mitre Saw with Other Tools

Integrating a hand mitre saw with other tools, such as a table saw or jigsaw, can increase your workshop’s capabilities. For example, using a table saw for ripping lumber before making precise mitre cuts can save time and energy, allowing for a seamless workflow.

DIY Projects to Practice Your Skills

To hone your hand mitre saw skills, consider taking on projects like building a picture frame or crafting simple furniture, such as a bookshelf. These projects require various cuts, providing practical experience while also resulting in finished products that you can use or display.

Trends in Woodworking and the Future of Hand Mitre Saws

The woodworking industry is evolving, with emerging technologies and sustainability trends shaping the future of tools like hand mitre saws. Staying informed on these trends can help you adapt and remain competitive in your craft.

Emerging Technologies in Woodworking Equipment

Advancements in materials and design are enhancing the functionality and durability of hand mitre saws. New blade technologies, like carbide-tipped blades, increase cutting efficiency and lifespan, making these tools more versatile than ever before.

Sustainability Trends in Woodworking Materials

As environmental awareness grows, more manufacturers are focusing on sustainable materials. Using reclaimed wood or eco-friendly adhesives not only helps the planet but also gives your projects a unique character.

Future-Proofing Your Skills for 2026 and Beyond

Continuously learning and adapting to new techniques and technologies is essential for staying relevant in woodworking. Attend workshops, watch tutorials, and engage with communities online to keep your skills sharp and informed about industry changes.

What is a hand mitre saw used for?

A hand mitre saw is primarily used for making precise angled and crosscuts in various materials, making it perfect for tasks like cutting moulding, framing, and furniture making.

How do you maintain a hand mitre saw?

Regular maintenance includes keeping the blade clean, sharp, and properly adjusted. Periodically check the saw’s frame for damage and ensure that all moving parts are lubricated and operating smoothly.

Can a hand mitre saw replace power saws?

While hand mitre saws can deliver precision, they may not replace powered saws for all tasks, especially when speed is essential. However, for detailed work, they often outshine powered options due to their control and accuracy.

What materials can I cut with a hand mitre saw?

Common materials include softwoods, hardwoods, and even some composite materials, depending on the blade used. Always ensure you have the correct blade for the material type to achieve optimal results.

Are hand mitre saws suitable for beginners?

Yes, hand mitre saws are well-suited for beginners. For more information, Mister Worker offers valuable insights. Their simplicity and manual operation allow new woodworkers to develop their skills without the intimidation of complex machinery.

Posted on

Choosing the Right Metal Fence Panels for Your Property

Enhance your property aesthetics with durable metal fence panels from www.metalfencepanels.co.uk.

Understanding Metal Fence Panels

What are Metal Fence Panels?

Metal fence panels are robust structures designed to provide security, privacy, and aesthetic appeal to residential and commercial properties. These panels are typically composed of various types of metals, offering durability and strength that surpasses traditional wooden or vinyl fencing. They are available in numerous styles and finishes, allowing property owners to choose an option that best suits their needs and personal taste. For more comprehensive options on metal fencing, you may explore www.metalfencepanels.co.uk.

Benefits of Metal Fencing

Metal fencing comes with a multitude of advantages, making it a popular choice among property owners. Here are some key benefits:

  • Durability: Metal fence panels are resilient against the elements, ensuring they last for years with minimal maintenance.
  • Security: These panels provide an impenetrable barrier that is difficult for intruders to breach.
  • Low Maintenance: Unlike wooden fences, metal panels resist rotting, warping, and pest damage, requiring only occasional cleaning.
  • Variety of Styles: Available in various designs and colors, metal fencing can complement any landscape or architectural style.
  • Eco-Friendly Options: Many metal fences are made from recycled materials, making them a sustainable choice.

Common Materials Used

Metal fence panels can be made from several types of materials, each with its unique properties:

  • Aluminum: Lightweight, corrosion-resistant, and available in various styles, aluminum is a popular choice for residential properties.
  • Steel: Known for its strength and sturdiness, steel fences provide high security and durability but may require protective coatings to prevent rust.
  • Wrought Iron: Offering a classic look, wrought iron is both beautiful and strong, perfect for ornamental gates and fences.
  • Chain Link: An economical option providing good visibility while maintaining security; it’s often coated with vinyl for enhanced durability.

Types of Metal Fence Panels

Chain Link Fencing

Chain link fencing is one of the most common types of metal fencing, recognized for its affordability and versatility. It often serves practical purposes, such as keeping pets contained or marking boundaries. Options like varying heights and coatings, including vinyl or galvanized steel, enhance its usability and aesthetics.

Wrought Iron Fencing

Wrought iron fencing is synonymous with elegance and strength. Its ornate designs can significantly elevate a property’s curb appeal while providing robust security. While durable, wrought iron requires more maintenance than other materials, primarily to prevent rust and maintain its finish.

Aluminum Fencing

Aluminum fencing is lightweight and resistant to corrosion, making it an ideal choice for areas with high moisture. These panels are available in various styles, resembling wrought iron but without the heavy maintenance. Due to their durability and low weight, they are often installed around pools, gardens, and properties requiring a decorative touch.

Installation Process for Metal Fence Panels

Preparation Steps

Before embarking on the installation of metal fence panels, some preparation steps must be followed:

  • Research Local Regulations: Check local regulations and homeowners’ association guidelines to ensure compliance.
  • Design Plan: Plan the layout of your fence, determining where it will be placed and how it will be secured.
  • Assess the Site: Walk the intended area to inform decisions on panel types and potential obstacles (like trees or utility lines).

Tools Required

Having the right tools will facilitate a smooth installation process. Essential tools include:

  • Post hole digger or auger
  • Level
  • Tape measure
  • Power drill with metal drill bits
  • Concrete mix (for securing posts)
  • Wrench and screwdrivers

Step-by-Step Installation Guide

Follow these steps to install metal fence panels effectively:

  1. Mark the Fence Line: Use stakes and string to outline where your panels will go.
  2. Dig Post Holes: Use a post hole digger to create holes for your fence posts, typically around 2-3 feet deep.
  3. Set the Posts: Place the posts in the holes and use the level to ensure they are vertical. Secure them with concrete.
  4. Attach Panels: Once the concreted posts have cured, attach your metal panels using the appropriate connectors.
  5. Final Checks: Once all panels are installed, perform a final inspection to ensure stability and alignment.

Maintenance Tips for Metal Fence Panels

Regular Cleaning Techniques

To extend the life of your metal fence panels, regular cleaning is crucial. Use a mild detergent mixed with water to clean the panels, ensuring no abrasive materials are used to prevent scratches. Rinse thoroughly to remove any soap residue.

Rust Prevention Methods

To guard against rust, consider these strategies:

  • Apply Protective Coatings: Ensure steel or wrought iron panels are coated with paint or galvanization to resist corrosion.
  • Regular Inspections: Periodically inspect for any signs of rust and address them promptly to prevent further damage.
  • Proper Drainage: Ensure that panels are installed in a way that promotes water runoff to minimize moisture exposure.

When to Replace Panels

Replacement of metal fence panels may be necessary when:

  • The panel is severely rusted or damaged beyond repair.
  • The structure is leaning significantly or unstable.
  • Design changes require a complete overhaul of the fencing system.

Frequently Asked Questions about Metal Fence Panels

How long do metal fence panels last?

With proper maintenance, metal fence panels can last 20 to 30 years. Factors like material quality and environmental conditions play a significant role in longevity.

Can metal fences withstand harsh weather?

Yes, metal fences are highly resilient against extreme conditions. Features like galvanized finishes further enhance their performance in harsh weather.

What is the cost of metal fence panels?

The cost varies based on materials, sizes, and styles. Typically, prices range from £20 to £100 per panel, excluding installation costs.

Are metal fence panels easy to install?

While metal fence panels are generally user-friendly, installation can be labor-intensive, especially for larger areas. DIY installation is possible with the right tools and guidance.

Do I need planning permission for metal fencing?

Planning permission may be required depending on the height and location of your fence. It’s advisable to check local regulations before installation.

Posted on

Enhancing Your Home with Elegant Showers: A Guide to Style and Functionality

Transform your space with elegant showers featuring sleek designs and vibrant greenery.

Understanding the Essence of Elegant Showers

When it comes to bathroom design, one of the most crucial elements that can dramatically enhance the overall aesthetic and functionality is the shower. The concept of elegant showers goes beyond mere practicality; it embodies a blend of style, sophistication, and superior craftsmanship. In this section, we will delve into the definition and key features of elegant showers while examining the benefits and current trends shaping this captivating niche.

Definition and Key Features of Elegant Showers

Elegant showers can be defined as thoughtfully designed shower spaces that are characterized by a harmonious balance of form and function. These showers often feature high-quality materials, refined finishes, and meticulous attention to detail. Key features commonly found in elegant showers include:

  • High-Quality Materials: The choice of materials significantly impacts both the aesthetics and durability. Elegant showers often utilize natural stone, glass, and premium metals.
  • Advanced Shower Technology: Innovations such as thermostatic controls, rain shower heads, and multi-function shower systems enhance the user experience while adding a touch of luxury.
  • Lighting and Ambiance: Proper lighting—whether through natural sources or carefully placed fixtures—can create a relaxing atmosphere that complements the shower’s design.
  • Customization Options: From the layout to the fixtures and finishes, elegant showers often offer customizable features tailored to individual preferences.

Benefits of Installing Elegant Showers

Investing in elegant showers transcends mere aesthetics; it can significantly enhance both the value and enjoyment of your home. Key benefits include:

  • Increased Home Value: A beautifully designed shower can boost your property’s market value, making it an attractive feature for potential buyers.
  • Enhanced Daily Experience: A luxurious shower experience promotes relaxation and rejuvenation, improving your overall well-being.
  • Energy Efficiency: Modern elegant showers often incorporate energy-efficient technologies, reducing water consumption without sacrificing performance.
  • Aesthetic Appeal: Elegant showers serve as stunning focal points, transforming your bathroom into a serene retreat.

Current Trends in Elegant Showers

The world of bathroom design is continually evolving, with new trends that elevate the concept of elegant showers. Currently, some notable trends include:

  • Minimalist Designs: Simplistic and clean lines create a sophisticated ambiance.
  • Natural Materials: Using organic materials like wood and stone emphasizes a connection to nature.
  • Smart Technology: Integration of smart control systems for lighting, water temperature, and even music enhances the shower experience.
  • Open Spaces: Walk-in and open-concept showers are increasingly popular, promoting a sense of space and accessibility.

Choosing the Right Design for Your Space

The design of your shower should complement the overall aesthetic of your bathroom while also reflecting your personal taste. Here, we explore various styles, materials, and integration techniques crucial in selecting the right design for your elegant shower.

Styles of Elegant Showers to Consider

When it comes to choosing a style for your elegant shower, consider the following popular options:

  • Modern: Characterized by clean lines and minimal ornamentation, modern showers often feature frameless glass enclosures and sleek fixtures.
  • Traditional: Featuring ornate elements such as clawfoot tubs and vintage fixtures, traditional showers evoke a timeless appeal.
  • Transitional: A blend of modern and traditional styles, transitional showers offer flexibility in design choices while maintaining elegance.
  • Rustic: Utilizes natural materials and earthy color palettes to create a warm, inviting space reminiscent of countryside retreats.

Color Schemes and Materials for Elegant Showers

Color plays a significant role in the perception of space, while material choice affects both durability and aesthetics. Recommended color schemes for elegant showers include:

  • Neutral Tones: Whites, grays, and beiges create a timeless and soothing backdrop.
  • Bold Accents: Incorporate vibrant colors through tiles or fixtures for a striking contrast.
  • Soft Pastels: Light colors such as mint green, blush pink, or pale blue are great for creating a serene atmosphere.

When choosing materials, consider:

  • Marble and Granite: These natural stones add elegance and durability, with unique patterns enhancing the aesthetic.
  • Glass: Used in enclosures and tiles, glass creates an illusion of space and allows light to penetrate.
  • High-Quality Metals: Brass, chrome, and matte black fixtures can add sophistication and modern touch.

Integration with Bathroom Décor

Integrating your elegant shower design with the overall bathroom décor is crucial for achieving coherence. Consider these tips:

  • Use Matching Fixtures: Select faucets and shower heads that echo the style of your bathroom’s hardware.
  • Coordinated Flooring: Ensure the flooring complements the shower tiles, enhancing the overall flow.
  • Incorporate Relevant Décor: Add features such as plant life, artwork, or decorative shelves that accentuate the elegant atmosphere.

Installation Process for Elegant Showers

Installing an elegant shower is a detailed process that requires planning and precision. Below, we will outline the preparation, step-by-step guide, and common mistakes to avoid during installation.

Preparation for Elegant Showers Installation

Before commencing the installation, follow these preparation steps:

  • Assess the Space: Measure the area to ensure the chosen shower design fits properly.
  • Choose Your Materials: Finalize the materials, colors, and fixtures you wish to use.
  • Plan for Plumbing: Review plumbing connections to confirm they align with your new shower system.

Step-by-Step Installation Guide

Here is a simplified step-by-step guide for installing elegant showers:

  1. Remove Existing Fixtures: Safely dismantle any existing shower components.
  2. Prep the Space: Ensure the area is clean and level. Repair any damage to walls or flooring.
  3. Install Shower Base: Place the shower base according to manufacturer instructions, ensuring it is level.
  4. Connect Plumbing: Install the plumbing connections and ensure everything is tight and secure.
  5. Secure Wall Tiles: Begin tiling the walls, working from the bottom up for better adhesion.
  6. Add Fixtures: Install the chosen showerhead, faucet, and other fixtures.
  7. Finish with Grouting: Complete the installation with grout around tiles to prevent water leakage.

Common Mistakes to Avoid

To ensure a successful installation of your elegant shower, be mindful of these common pitfalls:

  • Neglecting Measurements: Always double-check measurements before purchasing materials or fixtures.
  • Ignoring Drainage Concerns: Ensure optimal drainage to prevent water pooling or flooding.
  • Cutting Corners: Invest in quality materials and skilled installation to avoid future problems.

Maintenance Tips for Elegant Showers

To maintain the beauty and functionality of your elegant shower, regular maintenance is essential. Here are some expert tips for lasting quality.

Daily Care for Lasting Beauty

Simple daily habits can help preserve the elegance of your shower:

  • Rinse After Use: Rinse the walls and floor to remove soap scum and prevent buildup.
  • Use a Squeegee: Wipe down surfaces with a squeegee to eliminate water spots and mineral deposits.
  • Keep Bath Products Organized: Store products neatly to avoid clutter and maintain a clean look.

Addressing Common Issues with Elegant Showers

Even with the best care, issues may arise. Here’s how to address common problems:

  • Water Stains: Use a mixture of vinegar and water to remove mineral deposits effectively.
  • Leaky Fixtures: Regularly check for leaks and replace worn washers or seals to prevent damage.
  • Mold and Mildew: Ventilation is key; use bathroom fans and clean surfaces regularly with mold-resistant solutions.

Seasonal Maintenance Practices

Seasonal care can help maintain the condition of your elegant shower:

  • Spring Cleaning: Deep clean the shower, focusing on grout lines and all hidden surfaces.
  • Inspect Caulking: Check and replace caulking as needed to prevent water damage.
  • Winter Preparation: Insulate pipes if living in colder areas to prevent freezing and cracks.

FAQs About Elegant Showers

What is the average cost of elegant showers?

The cost of elegant showers varies widely based on materials and design, generally ranging from a few hundred to several thousand dollars, including installation.

How do I choose the right size for my elegant shower?

Measure your space carefully, considering both the bathroom’s layout and your personal preferences. Standard sizes are typically 30″ x 30″ or bigger for a comfortable experience.

Can I customize my elegant shower design?

Absolutely! Many manufacturers offer customizable options for materials, colors, fixtures, and layouts to suit your unique preferences.

What materials are best for elegant showers?

Best materials include natural stones like marble and granite, tempered glass for enclosures, and high-quality metals for fixtures, providing durability and elegance.

How can I maintain the elegance of my shower?

Regular cleaning, prompt attention to any issues, and proper daily care practices will help retain the elegance of your shower long-term.

Posted on

Hochwertige sonni sanitär Lösungen für Ihr modernes Badezimmer

Präsentation von sonni sanitär Produkten in einem modernen Badezimmer mit eleganten Designs.

Einführung in sonni sanitär Produkte

In der modernen Badgestaltung spielt die Auswahl der richtigen Produkte eine entscheidende Rolle, um sowohl Funktionalität als auch ästhetische Ansprüche zu erfüllen. sonni sanitär bietet eine umfassende Palette an Sanitärlösungen, die auf die Wünsche und Bedürfnisse der Verbraucher abgestimmt sind. Dieser Artikel gibt Ihnen einen tiefen Einblick in die Produkte von sonni sanitär und deren Vorteile.

Was sind sonni sanitär Produkte?

Produkte von sonni sanitär sind hochwertige Sanitäranlagen, die für Badezimmerlösungen entwickelt wurden. Dazu zählen Waschbecken, Duschsysteme, Badewannen und weiteres Zubehör. Diese Produkte zeichnen sich durch ihre innovative Technik, ansprechendes Design und Langlebigkeit aus. Die Marke sonni sanitär hat es sich zur Aufgabe gemacht, Produkte zu schaffen, die im Alltag praktisch sind und gleichzeitig eine ansprechende Optik bieten.

Vorteile der Nutzung von sonni sanitär

Die Verwendung von sonni sanitär Produkten bietet eine Vielzahl von Vorteilen:

  • Hohe Qualität: Die Produkte sind aus langlebigen Materialien gefertigt, die den täglichen Anforderungen gewachsen sind.
  • Ästhetisches Design: Modernes Design, das sich harmonisch in jede Badezimmereinrichtung einfügt.
  • Funktionalität: Produkte, die durch intelligente Lösungen und Anpassungsfähigkeit überzeugen.
  • Umweltfreundlichkeit: Viele Produkte sind wasser- und energiesparend, was zu geringeren Betriebskosten und Umweltauswirkungen führt.

Design-Philosophie hinter sonni sanitär

Die Design-Philosophie von sonni sanitär vereint Funktionalität mit Ästhetik. Jedes Produkt wird mit dem Ziel entworfen, Benutzerfreundlichkeit und Stil zu kombinieren. Die Designs sind klar und zeitlos, sodass sie sowohl in moderne als auch in klassische Badezimmer passen. Die Verwendung von nachhaltigen Materialien unterstreicht zudem das Engagement von sonni sanitär für Umweltschutz.

Vielfalt der angebotenen Produkte

Waschbecken und Armaturen

Waschbecken sind das Herzstück jedes Badezimmers. sonni sanitär bietet eine Vielzahl an Waschbecken in verschiedenen Formen und Größen an, die den individuellen Bedürfnissen gerecht werden. Die Armaturen sind nicht nur funktional, sondern auch ästhetisch ansprechend gestaltet. Sie zeichnen sich durch einfache Handhabung und eine hohe Langlebigkeit aus.

Duschsysteme und Badewannen

Die Duschsysteme von sonni sanitär bieten ein umfassendes Duscherlebnis durch innovative Technologien wie Regenduschen und Thermostatarmaturen. Die Badewannen sind in verschiedenen Größen und Designs erhältlich, perfekt für Entspannung und Wellness. Jedes Element der Dusch- und Badewannenlösungen ist so konzipiert, dass es maximalen Komfort bietet und gleichzeitig das Wasser effizient nutzt.

Zubehör für Badezimmerlösungen

Das Zubehör von sonni sanitär ergänzt die Hauptprodukte perfekt. Dazu gehören Seifenspender, Handtuchhalter, Ablaufgitter und vieles mehr. Jedes Zubehörteil wurde so entworfen, dass es sowohl funktional als auch stilvoll ist und die Gesamtgestaltung des Badezimmers harmonisch unterstützt.

Installation von sonni sanitär Produkten

Vorbereitung und Planung

Die Installation von sonni sanitär Produkten erfordert sorgfältige Planung. Zunächst sollten Sie den verfügbaren Platz im Badezimmer vermessen und eine Skizze der gewünschten Anordnung anfertigen. Überlegen Sie, welche Produkte Sie benötigen und wie sie am besten angeordnet werden können, um den Raum optimal zu nutzen.

Schritte zur Installation

Die Installation kann je nach Produkt variieren, umfasst jedoch im Allgemeinen folgende Schritte:

  1. Vorbereitung des Standorts, einschließlich der Anschlüsse für Wasser und Abwasser.
  2. Montage der Produkte gemäß den Anweisungen des Herstellers.
  3. Überprüfung der Dichtungen und Anschlüsse auf Dichtigkeit.
  4. Endgültige Tests der Funktionalität, um sicherzustellen, dass alles ordnungsgemäß arbeitet.

Häufige Fehler vermeiden

Ein häufiger Fehler bei der Installation ist das Versäumen der Überprüfung der Anschlüsse auf Dichtigkeit. Somit sollten die Anschlüsse vor der Fertigstellung der Wände oder Böden getestet werden. Ein weiterer häufiger Fehler ist das falsche Montieren von Armaturen oder Duschsystemen. Es ist wichtig, die Anweisungen sorgfältig zu lesen und alle erforderlichen Werkzeuge zur Hand zu haben.

Pflege und Wartung von sonni sanitär

Reinigungspraktiken für Langlebigkeit

Die regelmäßige Pflege der sonni sanitär Produkte ist entscheidend für deren Langlebigkeit. Verwenden Sie milde Reinigungsmittel und weiche Tücher, um die Oberflächen zu schützen. Vermeiden Sie abrasive Reinigungsmittel, die die Oberflächen beschädigen können. Eine regelmäßige Reinigung verhindert Ablagerungen und erhält das ursprüngliche Aussehen der Produkte.

Tipps zur Fehlerbehebung

Wenn Probleme auftreten, ist es wichtig, diese schnell zu lösen. Bei tropfenden Wasserhähnen kann oft eine Dichtung ausgetauscht werden. Bei Problemen mit der Dusche sollten die Schläuche auf Verstopfungen überprüft werden. Oft können einfache Fehlfunktionen selbst behoben werden, bevor professionelle Hilfe benötigt wird.

Wenn Sie professionelle Hilfe benötigen

Wenn Sie auf ernsthafte Probleme stoßen oder unsicher sind, wie etwas zu reparieren ist, ist es ratsam, einen Fachmann zu Rate zu ziehen. Ein Sanitärtechniker kann Ihnen helfen, eventuelle Probleme effizient zu lösen und sicherzustellen, dass die Installation weiterhin sicher und funktionell ist.

Häufige Fragen zur Nutzung von sonni sanitär

Welche Materialien werden verwendet?

Die Produkte von sonni sanitär bestehen aus hochwertigen Materialien wie Keramik, Edelstahl und Acryl, die langlebig und pflegeleicht sind.

Wie kann ich Produkte bestellen?

Produkte können direkt über die Website von sonni sanitär oder bei autorisierten Händlern bestellt werden. Die Verfügbarkeit variiert je nach Produkt.

Was sind die Garantiebedingungen?

Die Garantiebedingungen können je nach Produkt unterschiedlich sein. Die meisten Produkte kommen mit einer Garantie von mehreren Jahren, die Material- und Herstellungsfehler abdeckt.

Wie beeinflusst die Installation die Wasserrechnung?

Eine professionelle Installation von sonni sanitär Produkten kann helfen, Wasserverschwendung zu minimieren. Sparsame Armaturen und Duschsysteme tragen dazu bei, die Wasserrechnung zu reduzieren.

Wo finde ich Ersatzteile?

Ersatzteile für sonni sanitär Produkte sind direkt über die Website oder bei autorisierten Händlern erhältlich. Es ist wichtig, die Modellnummern bei der Anfrage zur Verfügung zu haben.

Posted on

Efficient Techniques for Spray Foam Insulation Removal in Your Home

See spray foam insulation removal process with a professional contractor at work.

Understanding Spray Foam Insulation Removal

What is Spray Foam Insulation?

Spray foam insulation is a popular choice for homeowners and builders due to its superior insulation properties and air sealing capabilities. Composed of isocyanate and polyol resin, it expands upon application to fill spaces tightly. This unique feature makes it effective at reducing energy consumption and improving indoor air quality. Although beneficial, there are situations where removal becomes necessary, particularly due to damage, health concerns, or remodeling.

Reasons for Removal of Spray Foam Insulation

There are several reasons why one might opt for spray foam insulation removal. The first reason is structural damage; over time, water infiltration can compromise the material, leading to mold growth. Secondly, health concerns may arise from off-gassing volatile organic compounds (VOCs) or allergens trapped within the foam. Lastly, remodeling projects often necessitate insulation removal to accommodate new structural designs or heating and cooling systems.

Potential Hazards Associated with Spray Foam

While spray foam insulation is effective, its installation and removal can pose several potential hazards. Improper application can result in air quality issues due to harmful chemicals present in the foam. Additionally, removing old spray foam insulation can release these same chemicals, putting contractors and homeowners at risk. As such, understanding these hazards is essential in ensuring a safe removal process.

Tools and Materials for Effective Removal

Essential Equipment for Spray Foam Insulation Removal

For effective removal of spray foam insulation, several essential tools are required. A reciprocating saw or foam cutter helps slice through thick layers of foam. Furthermore, a scraper or chisel is critical for easing the foam away from surfaces. Safety equipment like a HEPA vacuum is also invaluable for collecting debris and improving air quality during removal.

Safe Removal Supplies and Their Uses

Alongside essential equipment, specific removal supplies contribute to an efficient operation. Chemical solvents may be used to soften the foam for easier removal, while adhesive removers can eliminate any leftover residue. Gloves, goggles, and ventilation masks are necessary safeguards against harmful particles and fumes, ensuring safety throughout the process.

Protective Gear for Contractors

Contractors and anyone involved in the removal process should prioritize safety. The most effective protective gear includes long-sleeve shirts, safety goggles, respirators, and gloves. This gear protects against harmful dust and chemicals often released during the removal process. In addition, creating a well-ventilated area reduces the risk of inhaling any harmful substances that may be released.

Step-by-Step Process of Spray Foam Insulation Removal

Preparation and Planning Before Removal

Preparation is key to successful insulation removal. Initially, the working area is secured, and furniture is moved to create space. Inspecting the insulation for any signs of damage or mold also aids in planning the removal strategy. Ensuring that the necessary tools and protective gear are on hand can streamline the process and improve safety.

Executing the Removal Process

The actual removal process begins with cutting away the outer layers of foam using a reciprocating saw. Once a section is detached, a chisel or scraper is employed to remove the remaining foam from the surface. In some cases, chemical solvents may be applied to soften the foam for easier removal. The process continues systematically until all areas of problematic insulation are addressed.

Cleaning Up After Removal

Post-removal cleaning is just as critical as the actual extraction process. Use a HEPA vacuum to collect debris and remaining particulate matter effectively. Following vacuuming, surfaces should be wiped down to remove any lingering residues. Finally, proper disposal of the removed insulation according to local regulations is essential to prevent environmental contamination.

Common Challenges in Spray Foam Insulation Removal

Identifying Problematic Insulation Areas

Identifying problematic areas within spray foam insulation can be challenging. Signs to look for include discoloration, a musty odor, or visible mold growth. Utility bills that are unusually high may indicate ineffective insulation resulting from damage. A thorough inspection of all areas, including attics, walls, and crawl spaces, can help pinpoint these issues early.

Addressing Structural Damage During Removal

Structural damage may occur during the removal of spray foam insulation, particularly in older homes. Careful assessment is necessary to determine if any damage has occurred to underlying surfaces such as wood or drywall. Implementing a gentle removal technique and using the right tools can significantly reduce the risk of further damage during this critical phase.

Dealing with Residual Adhesives

Residual adhesives often pose another challenge after foam insulation is removed. These adhesives can be incredibly stubborn and require specialized chemical adhesives to tackle effectively. Using the appropriate de-adhesive products while following safety precautions ensures both efficiency and safety during this stage.

Safety Considerations and Tips

Understanding Health Risks of Spray Foam

Health risks associated with spray foam insulation are significant but manageable with proper precautions. Off-gassing during and after installation can lead to respiratory issues and allergic reactions. Understanding the chemicals involved can help homeowners and contractors take necessary protective measures to reduce exposure to these harmful substances.

Best Practices for Safety During Removal

To ensure safety during removal, contractors should follow best practices such as using adequate ventilation, wearing proper protective gear, and implementing the use of HEPA filters where necessary. Additionally, maintaining a safe distance from walls or ceilings as the foam is removed helps avoid potential hazards related to falling debris.

Post-Removal Safety Tips

Post-removal, it is crucial to monitor indoor air quality, particularly if chemicals were used during the process. Keeping the area well-ventilated will help dissipate any remaining harmful odors or particles. Additionally, it’s advisable to refrain from covering surfaces immediately after removal to allow any adhesives or chemicals to cure properly.

Frequently Asked Questions

What is the cost of spray foam insulation removal?

The cost of spray foam insulation removal can vary widely based on the size of the area and the extent of removal required. On average, costs can range from several hundred to several thousand dollars.

How long does the removal process take?

The duration for the removal process depends on the area involved and the complexity of the insulation. Minor removals can take a few hours, while larger projects may require several days.

Can I remove spray foam insulation myself?

While DIY removal is possible, it is not always recommended due to safety risks. Hiring professionals is advisable for larger jobs or those involving potential health hazards.

Is spray foam insulation safe for my home?

Spray foam insulation can be safe when professionally installed and managed. However, ongoing monitoring for potential allergens and exposure is important for maintaining a safe environment.

What happens to the structure after the foam is removed?

After spray foam is removed, the condition of the structure largely depends on the removal process. In some cases, damage may need repairs, while other sections might be left intact and ready for new insulation.

Posted on

Badezimmer-Trends: Innovatives Design mit sonni sanitär für Ihren Komfort

Optimale Lösungen mit sonni sanitär für modernes Badezimmerdesign und Hygiene.

Einführung in sonni sanitär

In der heutigen Zeit wird der Wert eines stilvoll gestalteten Badezimmers nicht unterschätzt. Die richtigen sanitären Einrichtungen können nicht nur den ästhetischen Reiz eines Raumes erhöhen, sondern auch erheblich zu dessen Funktionalität beitragen. Bei der Auswahl von Badezimmerlösungen haben sich Produkte von sonni sanitär als führend erwiesen, indem sie sowohl moderne Designs als auch praktische Anwendungen anbieten. In diesem Artikel werden wir die verschiedenen Aspekte von sonni sanitär näher betrachten, einschließlich der Produkte, die Sie benötigen, um ein Badezimmer zu schaffen, das sowohl gut aussieht als auch effizient genutzt werden kann.

Was sind sonni sanitär-Produkte?

sonni sanitär bietet eine breite Palette von Produkten an, die speziell für die modernen Wohnbedürfnisse entwickelt wurden. Dazu gehören Toiletten, Waschtische, Waschbecken, Duschen und Badewannen. Alle Produkte zeichnen sich durch höchste Qualität, Langlebigkeit und innovatives Design aus. Die Integration von neuesten Technologien, wie zum Beispiel wassersparenden Mechanismen oder smarten Funktionen, unterscheidet sonni sanitär von vielen anderen Marken auf dem Markt.

Warum sonni sanitär?

Die Wahl der richtigen Sanitärprodukte ist entscheidend für die Gesamtqualität Ihres Badezimmers. sonni sanitär ist durch sein Engagement für Qualität und Kundenservice eine vertrauenswürdige Marke, die sowohl in der Neubau- als auch in der Renovierungsbranche Anerkennung gefunden hat. Die Kombination aus Funktionalität, ansprechendem Design und Überzeugung in der Nachhaltigkeit macht sonni sanitär zur perfekten Wahl für alle, die ihr Badezimmer aufwerten möchten.

Bedeutung der Hygiene im Badezimmer

Hygiene sollte in jedem Badezimmer eine oberste Priorität sein. Die Wahl hochwertiger Produkte von sonni sanitär kann helfen, eine hygienische Umgebung zu schaffen. Mit einfachen Wartungstechniken und der Auswahl von langlebigen, leicht zu reinigenden Materialien können die Benutzer sicherstellen, dass ihr Badezimmer sowohl gut aussieht als auch hygienisch bleibt. Innovative Produkte von sonni sanitär sorgen dafür, dass Sie sich im Badezimmer wohlfühlen und gleichzeitig den besten Hygienestandard aufrechterhalten.

Die besten sonni sanitär-Lösungen

Moderne Toiletten: Funktionen und Vorteile

Toiletten von sonni sanitär sind mehr als nur funktionale Einrichtungen. Sie sind mit vielen intelligenten Funktionen ausgestattet, die den Komfort und die Effizienz steigern. Technologien wie der Wassersparmodus, das automatische Spülen oder die Geräuschreduzierung tragen dazu bei, dass jedes Toilettenerlebnis angenehm bleibt. Außerdem sind diese Toiletten einfach zu installieren und zu warten, da sie mit klaren Anleitungen und benutzerfreundlichen Designs konzipiert wurden.

Waschtische und Waschbecken im Detail

Waschtische und Waschbecken von sonni sanitär sind in verschiedenen Stilrichtungen und Größen erhältlich, was sie zu einer optimalen Wahl für jedes Badezimmer macht. Die Produkte sind in modernen Designs gehalten und aus hochwertigen Materialien gefertigt, die sowohl stilvoll als auch praktisch sind. Viele Modelle bieten zusätzliche Funktionen wie aufbewahrungsfreundliche Schubladen oder integrierte LED-Beleuchtung, die den täglichen Gebrauch erleichtern und angenehmer gestalten.

Duschen und Badewannen von sonni sanitär

Duschen und Badewannen von sonni sanitär sind wahre Wohlfühl-Oasen. Die Duschsysteme sind mit modernen Regenduschköpfen und innovativen Techniklösungen ausgestattet, um das Duscherlebnis zu verbessern und den Wasserverbrauch gleichzeitig zu reduzieren. Die Badewannen bieten nicht nur Platz für Entspannung, sondern sind auch mit Funktionen wie Whirlpool-Effekten oder energiesparenden Heizungssystemen ausgestattet. Diese Produkte passen sich den individuellen Bedürfnissen der Benutzer an und bieten eine unvergleichliche Freude am Baden.

Wartung und Pflege von sonni sanitär-Produkten

Reinigungstipps für dauerhaften Glanz

Um die Langlebigkeit Ihrer sonni sanitär-Produkte zu gewährleisten, ist die richtige Reinigung entscheidend. Verwenden Sie milde Reinigungsmittel und vermeiden Sie aggressive Chemikalien, die die Oberflächen beschädigen könnten. Regelmäßige Reinigung hilft, beispielsweise Kalkablagerungen zu vermeiden und das Aussehen der Produkte brillant zu halten. Verwenden Sie weiche Tücher und Schwämme, um Kratzer zu vermeiden und den Glanz zu bewahren.

Wie man kleinere Reparaturen durchführt

Kleinere Reparaturen an Sanitäranlagen können oft selbst durchgeführt werden. Dazu zählen das Festziehen von Armaturen oder das Austauschen von Dichtungen. Eine detaillierte Anleitung zur Reparatur ist in der Regel im Benutzerhandbuch enthalten. Durch regelmäßige Kontrollen und das rechtzeitige Beheben kleiner Mängel können größere Schäden vermieden werden, was Ihnen Zeit und Kosten spart.

Wann professionelle Hilfe benötigt wird

Es gibt Fälle, in denen die Unterstützung eines Fachmanns notwendig ist, insbesondere bei schweren Schäden oder komplexen Installationen. Wenn Sie zum Beispiel Probleme mit Rohrleitungen oder ständigen Leckagen haben, ist es ratsam, einen Spezialisten zu Rate zu ziehen. Professionelle Installateure verfügen über die nötige Erfahrung und das notwendige Werkzeug, um Probleme schnell und effizient zu beheben.

Nachhaltigkeit und Innovation bei sonni sanitär

Umweltfreundliche Materialien

sonni sanitär engagiert sich aktiv für Nachhaltigkeit, indem umweltfreundliche Materialien verwendet werden, die sowohl langlebig als auch recyclierbar sind. Diese Produkte tragen zur Reduzierung des ökologischen Fußabdrucks bei, ohne dass die Qualität und Funktionalität beeinträchtigt wird. Bei der Auswahl von sanitären Einrichtungen ist es sinnvoll, auf die verwendeten Materialien zu achten, um einen positiven Beitrag zur Umwelt zu leisten.

Effiziente Wasserlösungen

Die Wassereffizienz ist ein zentrales Thema in der Sanitärbranche. Innovative Technologien von sonni sanitär ermöglichen es, den Wasserverbrauch erheblich zu senken, ohne den Komfort zu beeinträchtigen. Viele Toiletten und Duschen sind so konzipiert, dass sie mit weniger Wasser auskommen, was nicht nur ökologisch, sondern auch ökonomisch vorteilhaft ist. Bei der Umrüstung auf solche Produkte können Haushalte ihren Wasserverbrauch erheblich senken.

Zukunftstrends in Badezimmertechnologien

Die Technologie im Badezimmer entwickelt sich ständig weiter. Smart-Home-Technologien, wie intelligente Wasserhähne oder Duschen, die über Apps gesteuert werden können, sind auf dem Vormarsch. Modelle wie diese bieten nicht nur zusätzlichen Komfort, sondern tragen auch zur Wasser- und Energieeinsparung bei. sonni sanitär ist an der Spitze dieser Innovationen und bietet Produkte an, die sowohl modern als auch funktional sind.

Häufige Fragen zu sonni sanitär

Wie wählt man die richtige Ausstattung aus?

Die richtige Ausstattung hängt von Ihrem Stil und Ihren Bedürfnissen ab. Berücksichtigen Sie Faktoren wie Raumgröße, Benutzeranzahl und persönliche Vorlieben bei der Produktauswahl.

Gibt es spezielle Angebote für Renovierungsprojekte?

Ja, sonni sanitär bietet häufig spezielle Angebote und Pakete für Renovierungsprojekte, um hervorragende Lösungen zu attraktiven Preisen zu ermöglichen.

Was sind die Vorteile von smarten Sanitäranlagen?

Smarte Sanitäranlagen bieten Komfort durch Anwendungen zur Steuerung, Effizienz durch Wasser- und Energiesparfunktionen sowie oft eine verbesserte Benutzererfahrung.

Wie lässt sich die Lebensdauer von Produkten verlängern?

Halte die Produkte sauber, führe regelmäßige Wartungen durch und verwende schonende Reinigungsmittel, um die Lebensdauer Ihrer sonni sanitär-Produkte zu maximieren.

Wo kann man sonni sanitär-Produkte kaufen?

sonni sanitär-Produkte sind in verschiedenen Fachgeschäften, Baumärkten und online über die offizielle Website erhältlich, wo Sie die gesamte Produktpalette finden.

Posted on

Upgrade Your Space with Elegant Showers: Design Ideas and Benefits

Transform your bathroom with elegant showers featuring sleek designs and luxurious details.

What Are Elegant Showers?

Defining Elegant Showers

Elegant showers embody sophistication and functionality, striking a perfect balance between style and utility. Often seen as the focal point of a modern bathroom, these installations are not merely utilitarian; they can transform an everyday routine into a luxurious experience. With a range of designs, materials, and technologies, elegant showers are tailored to provide both aesthetic appeal and comfort.

Key Features of Elegant Showers

Elegant showers typically feature smooth lines, high-quality finishes, and advanced functionalities. Common characteristics include:

  • Rainfall and Handheld Options: Dual shower heads allow for versatility and enhanced user experience.
  • Stylish Materials: From tempered glass to polished chrome, the materials used can elevate the overall design.
  • Smart Technology: Some models include Bluetooth capabilities, digital controls, and customized water settings.
  • Eco-Friendly Designs: Many elegant showers promote water conservation while maintaining performance.

Why Choose Elegant Showers?

Choosing elegant showers extends beyond mere aesthetics. They offer practical benefits, enhancing the overall functionality of the bathroom. Ideal for those looking to upgrade their personal space, these showers can improve the bathing experience significantly. With options that cater to taste, budget, and efficiency, elegant showers are a stylish investment.

Design Inspirations for Elegant Showers

Modern Minimalist Designs

Modern minimalist designs focus on simplicity and quality. Characterized by clean lines and uncluttered spaces, these showers often feature large glass panels, streamlined fixtures, and a neutral color palette. The aim is to create a serene sanctuary, promoting relaxation while taking a shower. Examples of this trend include frameless glass enclosures and wall-mounted faucets that contribute to the uncluttered aesthetic of the bathroom.

Classic Traditional Looks

For those who appreciate timeless elegance, classic traditional designs are an excellent choice. These showers often feature ornate details, such as vintage-style taps, intricate tile patterns, and brass accents. The bath space can be enhanced with natural stone or ceramic tiles, providing a nod to historical elements while maintaining modern comfort levels. Traditional designs frequently evoke a sense of nostalgia, melding old-world charm with current amenities.

Incorporating Natural Elements

Integrating natural elements into the shower design is a growing trend. This approach might involve using materials such as wood, stone, or greenery to create a connection with nature. A shower that opens to an outdoor space or incorporates reclaimed wood and natural stones can provide a tranquil, spa-like atmosphere. When combined with elegant fixtures, these elements enhance the overall luxurious feel of the bathroom.

Benefits of Installing Elegant Showers

Enhanced Aesthetics

Installing elegant showers significantly boosts the aesthetic appeal of a bathroom. They serve as a visual centerpiece, attracting attention with their design and sophistication. The right choice of materials and finishes can complement existing decor, elevating the whole space. A well-designed shower space can impress visitors and make the home feel more welcoming and luxurious.

Improved Functionality

Elegant showers are not just about looks; they improve functionality as well. Advanced features such as multiple spray settings, temperature control, and space-saving designs enhance the user experience. This focus on functionality ensures that showers not only look spectacular but are also practical for everyday use.

Increased Home Value

Upgrading to elegant showers can significantly increase the value of a home. Prospective buyers often look for upgraded bathrooms and modern amenities as key features in their search. Investing in a stylish and functional shower can yield a high return when it comes time to sell, making it a smart home improvement.

Installation Guide for Elegant Showers

Preparing Your Bathroom Space

Before installation, it’s crucial to prepare the bathroom space adequately. Start by measuring the area to ensure that the new shower will fit without obstructing pathways or other fixtures. Remove any existing fixtures and clean the area thoroughly, ensuring a smooth surface for the installation. Pay attention to plumbing requirements and make sure the drainage system is properly set up to handle the new elegant shower.

Selecting the Right Fixtures

Selecting the right fixtures is essential for achieving the desired look and functionality. Consider your style—whether modern or traditional—and choose fixtures that complement your overall design. Look for high-quality materials that promise durability and maintenance ease. Faucet styles, showerheads, and control systems should align with both the visual and practical needs of the space.

Common Installation Challenges

Installation can present challenges, such as plumbing issues, mismatched sizes, or improper sealing. To alleviate these concerns, consider hiring a professional installer experienced with elegant showers. Always refer to manufacturer guidelines for specific installation procedures, and ensure proper sealing to prevent leaks that can lead to water damage over time.

Maintenance Tips for Elegant Showers

Cleaning and Upkeep

Regular cleaning is key to maintaining the beauty and functionality of elegant showers. Use gentle, non-abrasive cleaners to avoid damaging surfaces. Focus on areas that collect mold and soap scum, using specialized shower cleaning products to help maintain the shine of fixtures. A squeegee can be a helpful tool to prevent water spots after each use.

Tips for Longevity

To ensure your elegant shower lasts for years, consider applying a protective treatment to surfaces that repel water and stains. Regular inspections for signs of wear, such as rust or corrosion, will allow for early interventions. Be cautious with heavy-duty products, as they can be harsh on sensitive materials, and always follow care recommendations provided by the manufacturer.

Addressing Common Issues

Common issues such as leaks, handle repair, and water pressure can often be resolved with a little troubleshooting. Leaks may result from loose connections or worn washers, which can be easily fixed. If shower pressure fluctuates, check for obstructions in the showerhead and plumbing. Recognizing and addressing these concerns promptly ensures that your shower remains both functional and elegant.

FAQs About Elegant Showers

1. What are the most popular materials for elegant showers?

Popular materials include glass, ceramic, stone, and high-quality metals like brass and chrome. These materials offer both durability and aesthetic appeal.

2. How can I reduce water usage without sacrificing comfort?

Install low-flow showerheads, which can significantly reduce water usage while still providing satisfying pressure and performance.

3. Are elegant showers suitable for small bathrooms?

Yes, many elegant designs are adaptable to small spaces, featuring compact layouts and glass enclosures that create an illusion of openness.

4. How often should I clean my elegant shower?

For optimal maintenance, cleaning should be done weekly, focusing on areas prone to mold and soap residue to keep it looking pristine.

5. Can I install an elegant shower myself?

While DIY installation is possible, professional installation is recommended for complex plumbing and to ensure a proper fit and finish.

Posted on

Innovative Garage Conversions in Bristol: Maximize Your Space in 2026

Garage conversions transformed into a cozy living space with modern decor and natural light.

The Benefits of Garage Conversions in Bristol

Garage conversions have emerged as one of the most popular home improvement projects in Bristol, offering homeowners a practical solution to maximize space and enhance property value. By transforming an underutilized garage into a functional living area, homeowners can enjoy numerous advantages, ranging from increased living space to potential rental income. When exploring options, Garage conversions provide comprehensive insights into how to effectively utilize your existing space.

Why Choose a Garage Conversion?

Choosing to convert your garage is not just about expanding your home; it’s about enhancing your lifestyle. A garage conversion offers flexibility to personalize your space according to your family’s needs. Whether you envision a cozy home office, an extra bedroom, or even a recreational room, the conversion process enables you to tailor the design to suit your specific requirements. Additionally, it can save you the hassle of moving homes, providing an economical and efficient solution to gain that much-needed space.

Cost-Effectiveness of Garage Conversions

Compared to traditional home extensions, garage conversions are often more cost-effective. The expenses associated with converting a garage are typically lower than the costs of building an extension from the ground up. This budget-friendly option allows homeowners to invest in high-quality finishes and design elements without stretching their finances. Furthermore, the initial investment is frequently offset by the increased property value that can accompany a well-executed conversion.

Boosting Property Value through Garage Conversions

One of the most compelling reasons to consider a garage conversion is its potential to significantly boost your home’s market value. Recent studies indicate that a well-planned garage conversion can increase property value by as much as 20%. This enhancement is particularly beneficial in a competitive real estate market like Bristol, where buyers are attracted to homes that offer additional functional spaces.

Types of Garage Conversions

Single vs Double Garage Conversions

When considering garage conversions, the type of garage plays a crucial role in determining the scope of the project. Single garage conversions typically offer enough space for a single room, while double garages can be transformed into larger living areas or even multiple rooms. Understanding the spatial dynamics and layout options for each type ensures homeowners get the most out of their conversions, creating spaces that enhance both comfort and utility.

Transforming Detached Garages

Detached garages hold unique potential for conversions, often allowing for more creative flexibility. These structures can be transformed into guest houses, home offices, or hobby rooms without the constraints of attached garages. The ability to ensure sound separation from the main home adds an appealing dimension for families with teenagers or for those requiring a quiet workspace.

Popular Room Ideas for Garage Conversions

The possibilities for garage conversions are virtually endless, with homeowners increasingly seeking innovative ways to utilize this space. Some popular ideas include:

  • Home Offices: As remote work continues to rise, converting a garage into a dedicated workspace can enhance productivity while providing a separation between professional and personal life.
  • Extra Bedrooms: For growing families, turning a garage into an additional bedroom can resolve space issues while adding value to your home.
  • Entertainment Spaces: Many homeowners opt to create game rooms or home theaters, making entertaining friends and family more enjoyable.
  • Gyms: A private gym can be an attractive conversion, providing the convenience of workout space without the need to travel to a commercial gym.

Planning Your Garage Conversion

Understanding Planning Permissions

Before embarking on a garage conversion project, it is essential to understand the planning permissions involved. Generally, most garage conversions do not require planning permission, especially if the work is internal and maintains the building’s original footprint. However, if you plan to alter external walls or make structural changes, obtaining permission may be necessary. Consulting with a professional can help navigate these requirements and ensure compliance with local regulations.

Key Considerations Before Starting

When planning a garage conversion, several critical factors should be considered:

  • Insulation: Garage spaces often lack adequate insulation, which is vital for creating a comfortable living area. Investing in proper insulation ensures year-round usability.
  • Utilities: Consider what utilities will be needed in the new space. Will you require heating, plumbing, or electrical updates? These elements can significantly impact the overall budget.
  • Access: Ensure there is sufficient access between the garage and the main home, which may entail adding doorways or hallways for functionality.

Working with a Professional Contractor

To achieve a successful garage conversion, collaborating with experienced professionals is crucial. A reputable contractor will guide you through the design process, manage timelines and budgets, and ensure that all work complies with building regulations. Their expertise can help you avoid common pitfalls and achieve a result that meets both your vision and practical needs.

Average Costs for Garage Conversions in Bristol

Cost Breakdown for Single Garage Conversions

The financial aspect of garage conversions is a significant consideration for many homeowners. On average, converting a single garage in Bristol costs between £6,000 and £10,000. This range can vary based on design choices, materials used, and the complexity of the project.

Factors Affecting Conversion Costs

Several factors can influence the total costs of a garage conversion:

  • Size: Naturally, larger spaces will require a greater investment of both time and money.
  • Design Features: High-end finishes, bespoke cabinetry, or specialized installations like bathrooms can elevate costs.
  • Structural Changes: If your conversion requires significant structural adjustments, these will add to the overall expense.

Getting Accurate Quotes for Your Project

Obtaining multiple quotes from contractors is essential for ensuring you receive reasonable pricing. During consultations, be specific about your vision and requirements, allowing contractors to provide tailored quotes that reflect your project’s unique needs.

Future Trends in Garage Conversions

Innovative Design Ideas for 2026

As homeowners seek unique solutions for their spaces, innovative design trends are emerging. Expect to see a surge in eco-friendly conversions, utilizing sustainable materials and energy-efficient systems to create environmentally responsible living spaces. Furthermore, multi-functional spaces are becoming more popular, where areas can serve various purposes, such as a guest room that doubles as an office.

The Rise of Eco-Friendly Conversions

Today’s consumers are increasingly interested in sustainable living. Garage conversions can easily incorporate eco-friendly elements, such as solar panels, energy-efficient lighting, and recycled materials, to reduce the carbon footprint. Focusing on sustainability will not only appeal to environmentally conscious buyers but also align with future market trends.

Market Predictions for Garage Conversions

Looking ahead, the demand for garage conversions is projected to remain strong. As housing prices rise, many homeowners will prefer to utilize existing structures rather than move. This trend will lead to greater innovation in design and technology, with contractors adapting to meet evolving homeowner needs and preferences.

What is a garage conversion?

A garage conversion is the process of transforming an existing garage structure into a functional living space, which can serve a variety of purposes such as a home office, bedroom, or recreational area.

How long does a garage conversion take?

The duration of a garage conversion can vary; however, most simple conversions can be completed in as little as one week, while more complex projects may take several weeks to finalize.

Do I need planning permission for a garage conversion?

In most cases, planning permission is not required for garage conversions as long as the work is internal and does not alter the external dimensions of the building. However, it’s essential to check local regulations.

What are the costs associated with garage conversions?

The cost of converting a garage can vary widely depending on its size, purpose, and the quality of finishes chosen. On average, costs range from £6,000 to £10,000 for a single garage.

Can I convert my garage into multiple rooms?

Yes, it is possible to convert a garage into multiple rooms, especially if you have a double garage. This type of conversion may require more extensive planning and structural considerations.

Posted on

Enhancing Your Colonial Home Addition for Style and Functionality

Colonial home addition showcasing elegant columns and spacious porch in natural lighting.

Understanding Colonial Home Addition Design Principles

Historical Context of Colonial Architecture

Colonial architecture, rooted in the 17th and 18th centuries, reflects the European influences brought by settlers to the Americas. Primarily inspired by the architectural styles of England, France, and Spain, these homes were designed for both practicality and aesthetics. Characterized by their symmetry, crucial proportions, and the use of local materials, colonial homes became a symbol of growing American identity. As you ponder a colonial home addition, it’s essential to understand these historical foundations to ensure the new part of your home seamlessly integrates with the old.

Key Features of Colonial Style Additions

When designing a colonial home addition, several key features must be taken into account. Primarily, symmetry is vital; traditional colonial homes exhibit an even distribution of windows and doors along a central axis. Furthermore, the use of pillars and porticos remains distinctively colonial. These classic elements ensure that any additions maintain harmony with the existing structure. Utilizing materials such as brick, wood siding, and traditional roofing will also help preserve the architectural authenticity.

Balancing Modern Needs with Classic Aesthetics

The challenge of blending a modern living space within a colonial framework can be daunting yet rewarding. While preserving classic aesthetics, practical living needs such as open floor plans and updated amenities must also be prioritized. This requires thoughtful planning and creativity, ensuring that new spaces do not detract from the home’s historical charm. Consider incorporating modern conveniences, like energy-efficient appliances, while maintaining styles that echo colonial design principles.

Planning Your Colonial Home Addition Project

Assessing Your Space and Budget

The first step in planning your colonial home addition is to evaluate your current space and set a realistic budget. Start by consulting a professional architect who specializes in colonial architecture for design concepts that align with your vision. Assess whether your lot size can accommodate the new structure without compromising the existing home’s space. Additionally, aligning your budget with your desires is crucial. Consider costs related to materials, labor, permits, and potential unforeseen expenses during construction.

Choosing the Right Contractors

Selecting the right contractors can make all the difference in your colonial home addition project. Seek professionals experienced in colonial architecture to maintain the integrity of your design. Verify their credentials and look for reviews or references from past clients. Engaging a contractor with both design and construction skills can streamline the process, ensuring that your vision is accurately translated into reality.

Obtaining Necessary Permits and Approvals

Before starting construction, it’s essential to secure the necessary permits and approvals. This not only ensures compliance with local building codes but also helps avoid costly fines. Consider reaching out to your local zoning office to review any restrictions applicable to colonial home additions, especially in historic neighborhoods. Additionally, some areas may require a historical review for alterations to existing structures.

Materials and Finishes for Colonial Home Additions

Traditional vs. Modern Materials

When planning a colonial home addition, the choice of materials will significantly affect the overall aesthetic and functionality. Traditional materials, such as brick, wood, and stucco, not only offer authenticity but also blend elegantly with colonial architecture. However, modern materials such as fiber cement siding or energy-efficient windows may be adapted into the design while providing advantages like durability and lower maintenance. The key is to find materials that complement existing structures while meeting modern performance standards.

Color Schemes That Complement Colonial Architecture

Color choice in colonial home additions should reflect the classic palette typically found in colonial homes. Neutral colors such as whites, creams, and soft pastels work well, often accompanied by darker accents for trim work or doors. However, maintaining a color unity with the existing structure is vital; again, consulting a color expert or architect can help finalize a scheme that honors the history of your home while reflecting your personal style.

Energy-Efficient Upgrades and Sustainability

Incorporating energy-efficient and sustainable materials into your colonial home addition can significantly enhance your home’s comfort and reduce utility costs. Windows that offer high insulation values, and roofing materials that limit heat absorption, can improve energy efficiency. Additionally, using sustainably sourced materials not only minimizes your project’s environmental impact but can also give your home a contemporary edge, aligning modern needs with historical respect.

Maximizing Functionality in Colonial Home Additions

Creating Versatile Living Spaces

Maximizing functionality in your colonial home addition is about creating spaces that accommodate various needs. Open-concept designs that allow for fluid movement between the kitchen, dining, and living areas can make your home more family-friendly. Think about how each space can serve multiple functions, e.g., a dining room that doubles as a workspace or a sunroom that can host gatherings. Flexible layouts will ensure longevity in design as family needs evolve.

Incorporating Storage Solutions

Modern homes thrive on efficient storage solutions. In your colonial home addition, consider built-in cabinetry, hidden storage under benches, or utilizing vertical space with shelving that aligns with the colonial aesthetic. These ingenious storage methods not only enhance practicality but can also keep your new spaces looking tidy while respecting the historical oak beams and craftsmanship typically found in colonial design.

Designing Outdoor Spaces for Family Activities

Outdoor space design is as crucial as interior planning. For colonial homes, traditional outdoor features such as porches and patios can extend the living area seamlessly into the yard. Incorporating elements like outdoor fireplaces or kitchen areas can facilitate family gatherings. Landscaping with colonial-era plants will tie the addition to the original home while creating inviting space for outdoor activities and relaxation.

Frequently Asked Questions About Colonial Home Addition

What are common features of a colonial home addition?

Common features include symmetrical facades, decorative columns, and traditional roofing that matches the original structure.

How can I blend a new addition with my existing home?

Focus on matching architectural styles, materials, colors, and rooflines to ensure a cohesive appearance.

What permits do I need for a colonial home addition?

Permits vary by location but often include building permits, zoning permits, and possibly historical review approvals.

Can I use modern materials in my colonial home addition?

Yes, modern materials can be used, but they should complement the traditional look and enhance energy efficiency.

What is the average cost of a colonial home addition?

The cost can vary widely but typically ranges from $150 to $300 per square foot, depending on materials and complexity.

Posted on

Maximizing Your Home’s Value with a Roofing Company

Roofing company team inspecting a house, demonstrating professionalism and teamwork.

Understanding the Importance of a Roofing Company

A well-maintained roof is the foundation of any sturdy home, providing safety, insulation, and aesthetic appeal. Hiring a reliable Roofing company is essential for ensuring that your roof remains functional and looks great over time. Without the expertise of professionals in the field, homeowners might overlook significant issues or compromise the integrity of their homes. This article dives into the critical role of roofing companies, the services they provide, how to choose the right one, and the diverse roofing materials available today.

Role of a Roofing Company in Home Maintenance

The role of a roofing company extends beyond mere installation. They serve as critical partners in home maintenance, offering services that keep your roof health strong throughout its lifespan. From routine inspections to emergency repairs, a professional roofing company ensures that potential problems such as leaks, mold growth, and structural damage are addressed swiftly and expertly. Regular interactions with a roofing company can enhance the longevity of your roof and even improve your home’s energy efficiency.

Common Reasons to Hire a Roofing Company

There are several key reasons why homeowners choose to hire a roofing company:

  • Expertise and Experience: Professionals possess the skills and knowledge required to navigate the complexities of roofing.
  • Safety: Roofing can be dangerous; hiring professionals mitigates risks associated with heights and equipment.
  • Access to Quality Materials: Roofing companies often have access to high-quality materials at competitive prices, ensuring long-lasting results.
  • Time Efficiency: A roofing company can complete projects quicker due to their experience and manpower.
  • Warranty and Insurance: Professional services often come with warranties that protect your investment.

Identifying Quality Roofing Services

Identifying a quality roofing service involves looking for certain traits and credentials. A reputable roofing company should be licensed, insured, and have a solid track record of satisfied customers. Additionally, they should offer a diverse range of services, including repairs, installations, and preventative maintenance. Asking for references and reviewing past projects can also help gauge their quality of work and reliability.

Choosing the Right Roofing Company

Choosing the right roofing company is not a decision that should be taken lightly. With many options available, it is imperative to undertake thorough research to find the most suitable contractor for your roofing needs.

Factors to Consider When Selecting a Roofing Company

When deliberating on the selection of a roofing company, consider the following factors:

  • Experience: How long has the company been in business? Experience can indicate reliability.
  • Licensing: Ensure the company has the necessary licenses to operate in your area.
  • Insurance: Confirm that they have liability insurance and worker’s compensation to protect you from lawsuits.
  • Range of Services: Look for a company that offers a broad spectrum of services tailored to your needs.
  • Local Reputation: A reputable company will have positive testimonials or reviews from previous clients.

Researching Local Roofing Company Options

When looking for a roofing company, local options often provide significant advantages. Local companies understand the specific weather conditions and building regulations in your area, which can directly affect the materials they recommend and the installation process. Use online resources, social media, and neighborhood recommendations to compile a list of potential candidates.

Checking Reviews and Certifications for Roofing Companies

Before making a final decision, conduct thorough checks on reviews and certifications of the roofing companies on your list. Websites such as Yelp, Google Reviews, and the Better Business Bureau can provide insights into customer satisfaction. Certifications from industry-leading organizations indicate that the company adheres to established standards and practices. Always ask potential contractors for any testimonials or documented case studies from previous clients.

Common Roofing Services Offered

Roofing companies offer a variety of services designed to protect and enhance your home. Below are some of the most common services you can expect.

Repairs and Maintenance from a Roofing Company

Routine maintenance and repairs are fundamental services provided by roofing companies. Regular inspections can unveil issues before they develop into serious problems, saving you significant money in the long run. Common repairs include fixing leaks, replacing damaged shingles, and addressing structural damage caused by storms or general wear and tear.

New Installations Provided by Roofing Companies

Whether you’re building a new home or looking to replace an existing roof, a roofing company can guide you through the installation process. They will assess your roofing needs based on architectural style, building codes, and your preferred materials. Professional installation is critical for ensuring optimal performance and longevity.

Additional Services and Materials Used by Roofing Companies

Many roofing companies provide additional services such as gutter installation, insulation enhancements, and the application of protective coatings. When it comes to materials, options range from traditional asphalt shingles to modern metal roofing, tile, and flat roofs, each offering unique benefits and aesthetics.

Understanding Roofing Materials and Their Benefits

Choosing the right roofing material is one of the most impactful decisions a homeowner can make during a roofing project. Understanding the available options and their benefits can significantly affect your home’s value and efficiency.

Popular Roofing Materials Used by Roofing Companies

Among the most popular roofing materials used by companies today are:

  • Asphalt Shingles: Affordable and easy to install, making them a common choice for many homeowners.
  • Metal Roofing: Durable and energy-efficient, with a lifespan often exceeding 50 years.
  • Tiles: Known for their longevity and aesthetic appeal, especially in warmer climates.
  • Wood Shakes: Provide a natural look, ideal for rustic-style homes, but require more maintenance.
  • Flat Roofing Systems: Common in commercial settings but increasingly used in residential areas due to their modern appearance.

Energy Efficiency Considerations with Roofing Company Installations

Energy-efficient roofing can significantly reduce your energy bills and contribute to a healthier environment. When considering a new roof, explore options like reflective coatings, proper insulation, and energy-efficient shingles designed to minimize heat absorption. A knowledgeable roofing company can provide insights about the best choices based on your home’s structure and local climate.

Long-Term Value of Quality Roofing from a Roofing Company

A quality roofing system not only protects your home but also enhances its market value. Investing in high-quality materials and expert installation can yield substantial returns when it comes time to sell. Additionally, a well-maintained roof can ward off costly repair issues that often arise with cheap materials and poor workmanship.

FAQs About Hiring a Roofing Company

What should I look for in a roofing company?

Seek experienced, licensed professionals with good reviews and competitive quotes. Their knowledge and expertise will ensure your roofing project runs smoothly.

How long does a roofing project usually take?

Most projects take between a few days to two weeks, depending on complexity and weather conditions. Your roofing company can provide a clearer timeline based on your specific project.

Will my insurance cover roofing repairs?

Often, yes; many homeowners’ insurance policies cover roofing repairs caused by damage or storms. It’s essential to check with your insurance provider for specifics.

What types of warranties do roofing companies offer?

Warranties typically cover materials and labor; always clarify details before hiring. A good warranty can protect you against future defects.

How can I maintain my roof after installation?

Regular inspections, cleaning gutters, and removing debris are essential for upkeep. You should also address any signs of damage immediately to prolong your roof’s lifespan.